Introduction
Welcome to our blog, where we delve into the technical wonders of the Cricut Maker 3 and guide you step-by-step through the creation of a single-sheet kirigami pop-up. In this exploration of both the technical aspects and hands-on crafting, we'll unlock the potential of the Cricut Maker 3. Join us as we unravel the intricacies of this remarkable device, providing insights into its technical attributes and offering a detailed guide to crafting a stunning kirigami pop-up, showcasing the magic that unfolds when technology and creativity converge. Get ready to embark on a journey of innovation and hands-on crafting with the Cricut Maker 3!
Technical capability
The Cricut Maker 3 serves as a definitive example of precision engineering, showcasing an exceptional level of accuracy in handling various materials. Its prowess extends from delicately cutting intricate paper designs to seamlessly processing diverse fabrics and even leather. The Maker 3's remarkable precision is not by chance but rather a result of meticulous engineering efforts. Every detail of its design has been carefully crafted and optimized to ensure unparalleled accuracy in material processing. From the intricacies of paper to the versatility of fabrics and the resilience of leather, the Cricut Maker 3 stands as a testament to how precision engineering elevates the capabilities of crafting tools, delivering reliable and exact results across a spectrum of creative projects. Cricut Maker has a variety of features that make it suitable for both crafting and engineering applications:
-
Precision tools: Cricut Maker 3 provides precision in cutting thin materials because of the precision crafting tools. There are 3 types of blades: Fine-Point Blade, Rotary Blade and Knife Blade that can perform cutting, shearing, embossing, slitting, separating, and creasing of materials. The Cricut Premium Fine-Point Blade is designed to cut light to mid-weight materials, such as cardstock, vinyl, iron-on, poster board, lightweight fabrics, while the Rotary Blade takes the lead for intricate fabric cuts without the need for a backing material. The Knife Blade can be used for heavier-duty projects, which can effortlessly slice through materials like leather and chipboard. Additionally, the scoring wheel ensures crisp and accurate folds for perfect paper and cardstock projects. With these tools in hand, the Cricut Maker 3 opens up a world of possibilities for creating with precision and creativity. The CAD software, Cricut Design Space, extends the classical paradigm of GUI based programming to crafting. The Design Space provides a nice interface in which we can design the cut patterns which can then be translated into a physical design.
-
Material compatibility matrix**: Because of the variety of cutting tools in Cricut, we can cut a different materials. The Cricut Maker 3 can cut over 300 materials, including delicate paper and fabric, and tougher materials like leather, matboard, and balsa wood. The Maker 3 can cut materials up to 2.4 mm (3/32") thick with the knife blade. Cricut has released a new range of smart materials that can be used in Cricut Maker 3 without the use of mats. This is an absolute game changer for crafters who create larger-than-average designs. Sheets are measured in the unit of grams per square meter (gsm for short). A standard A4 sheet is 75 gsm whereas a T-shirt is 240 gsm. The larger the gsm of a sheet, heavier is the material and is often perceived as higher quality. Sheets having low gsm can be cutted easily with low cutting pressure but as the gsm of the sheet increases the cutting pressure should increase accordingly. You can also adjust the pressure for a fine point blade from 70 to 350 (which is magnitude of pressure measured in arbitrary units). When adjusting the material settings, you can start with increments of 5 to 10 to 15 to find the perfect number. The machine can give you some clues as to whether you need to adjust your cutting pressure. For example, a brand new blade may be so sharp that it cuts too deeply. In this case, you may need to decrease the pressure.
-
Cutting mat: In the crafting universe of the Cricut Maker 3, mats play a crucial role in ensuring precision and stability during the cutting process. These mats act as reliable foundations, holding your chosen materials securely in place as the machine works its magic. With these mats as your crafting sidekicks, the Cricut Maker 3 ensures your materials stay put, allowing you to bring your imaginative designs to life with stability and precision. There are 3 types of mats: standard grip, strong grip, and light grip. Standard grip is a versatile choice for a wide range of materials, including cardstock, vinyl, and patterned paper. Strong grip is ideal for heavier materials like thick cardstock, fabric with backing, or specialty materials. The light grip is suited for delicate materials like thin paper, vellum, or light cardstock.
Crafting process: Single-sheet Kirigami pop-up
In this section we will learn to make a pop-up design from Paul Jackson's book titled Cut and Fold Techniques for Pop-Up Designs Crafting. The crafting process has primarily 3 major steps:
-
Creating the SVG in Inkscape: Begin by designing your kirigami pop-up in Inkscape.
-
Open Inkscape and create your design.
-
Use Inkscape's tools to create intricate patterns for your kirigami pop-up.
-
Save your design in SVG format for compatibility with Cricut Design Space.
-
-
Uploading to Cricut Design Space: Import your SVG design into Cricut Design Space for customization and cutting.
-
Open Cricut Design Space and create a new project.
-
Upload your SVG file and adjust the size and orientation as needed.
-
Use the features in Cricut Design Space to fine-tune your design.
-
-
Cutting with Cricut Maker 3: Prepare your Cricut Maker 3 for the cutting process.
-
Place a 280 gsm paper on the StrongGrip mat.
-
Choose the knife edge tool for precise cutting.
-
Load the mat into the Cricut Maker 3 and initiate the cutting process.
-

creating the design pattern, and uploading it to Cricut Design Space.
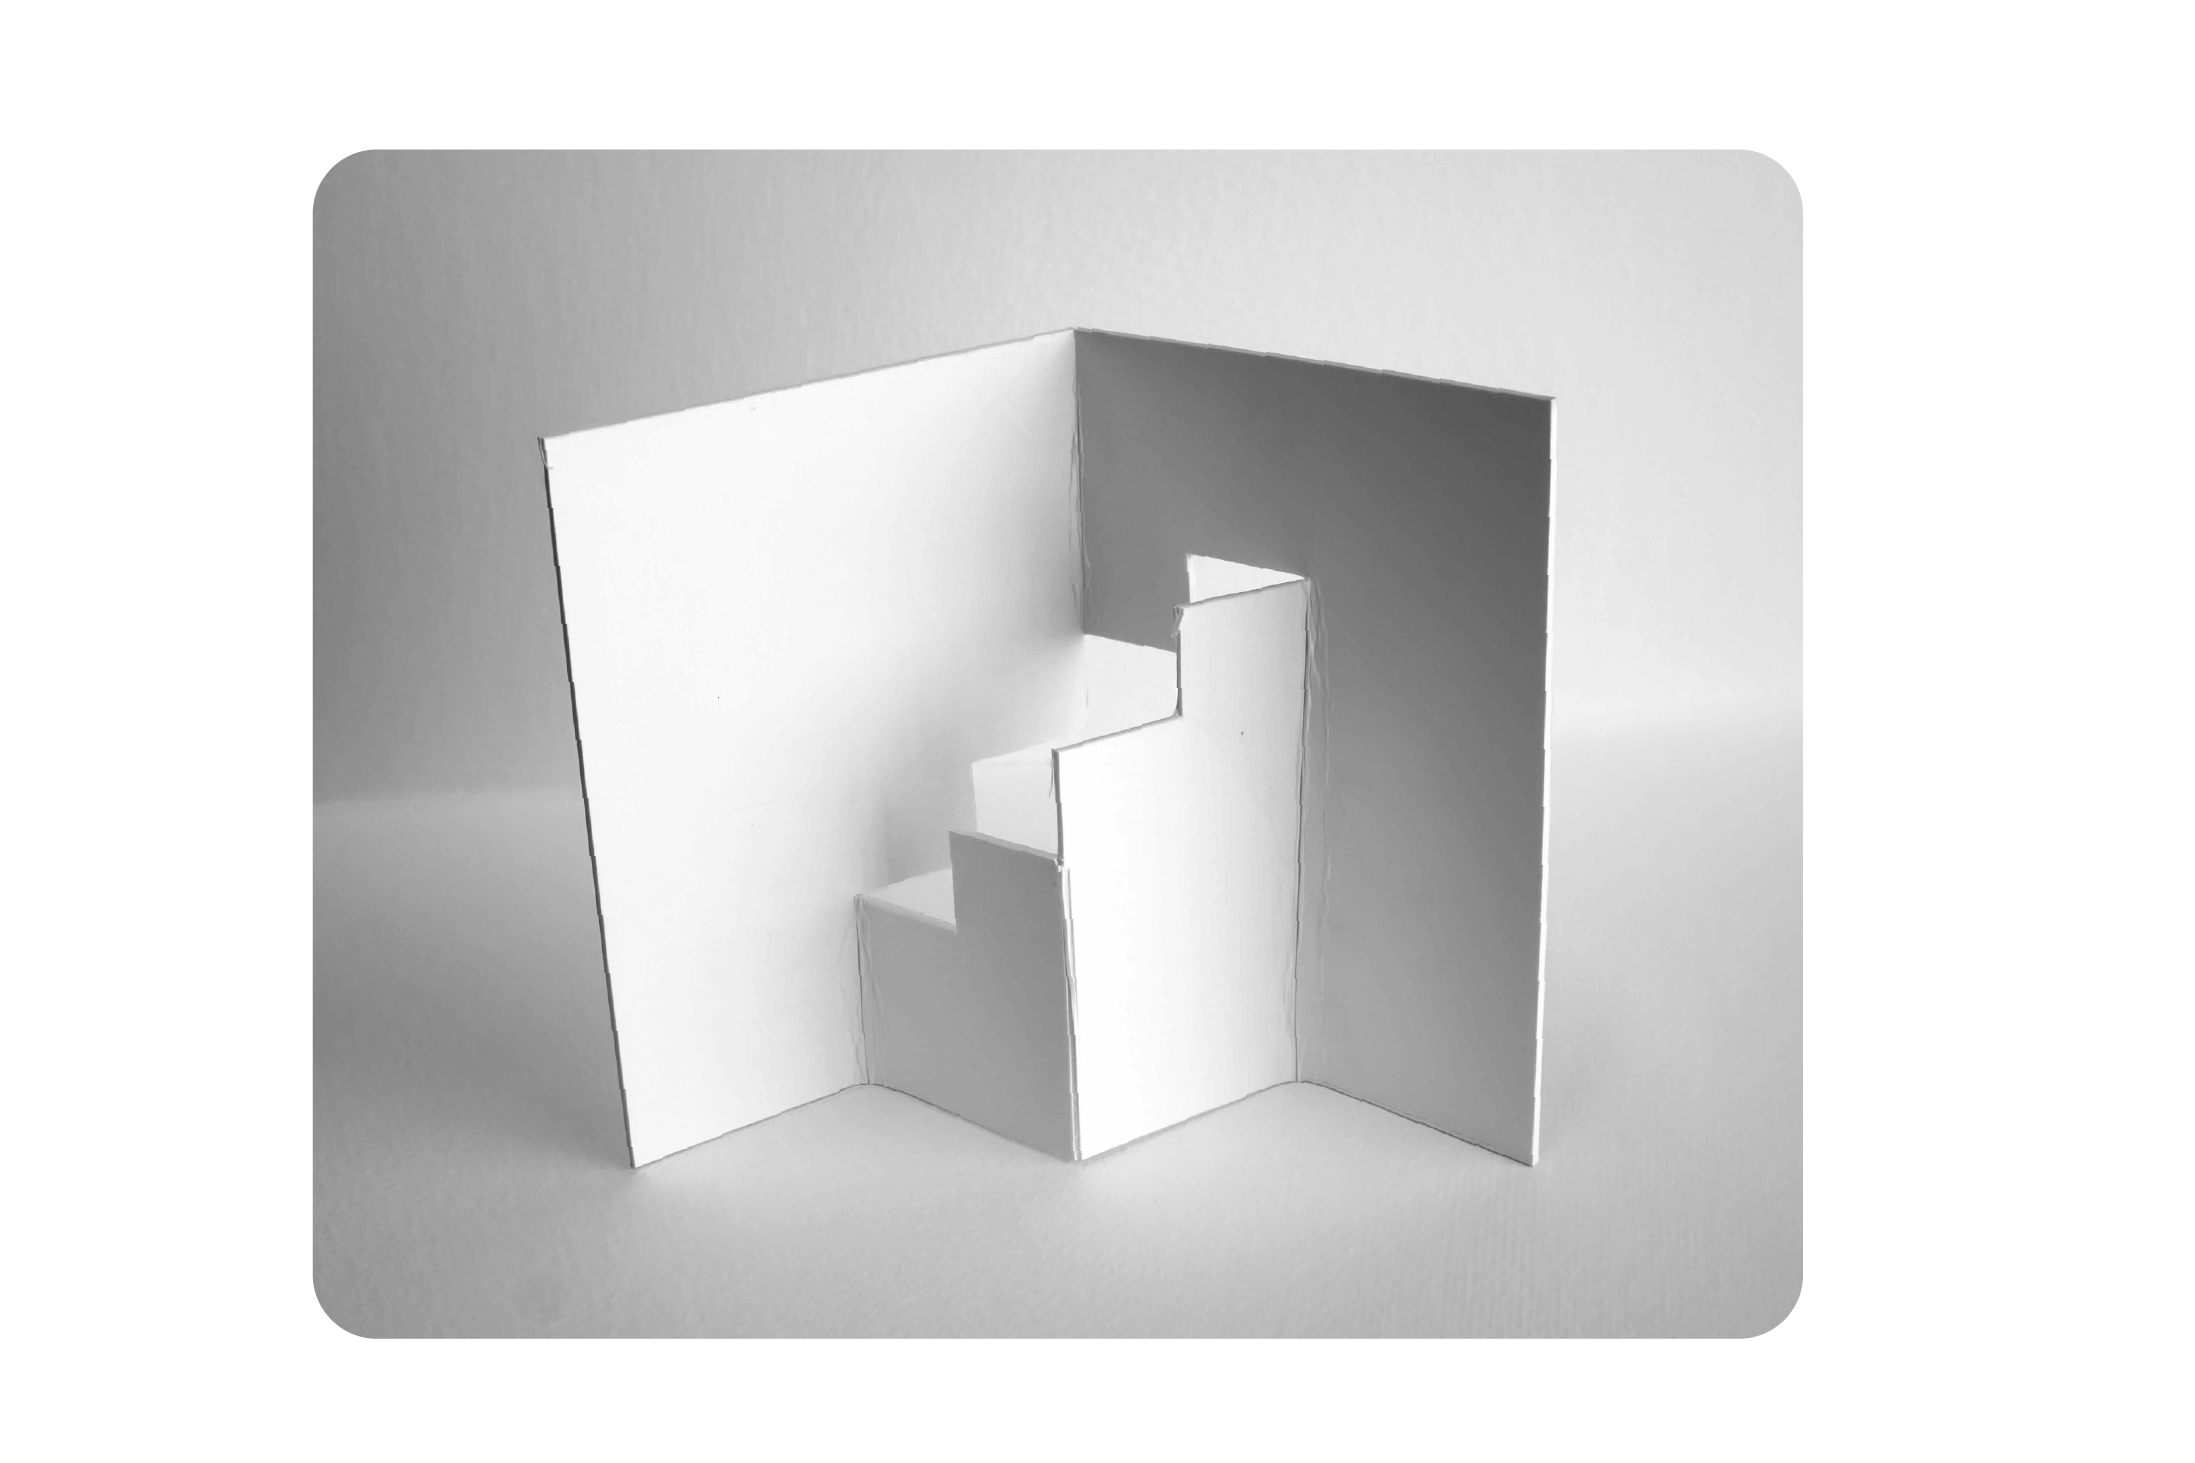
Final Result: Marvel at the final result of your kirigami pop-up shown in figure above crafted with precision using the Cricut Maker 3!
Conclusion
In the end, the Cricut Maker 3 is like a crafting superhero using cool technology. It helps people make things with super-precise details, making crafting more awesome. As crafting moves into the digital age, the Maker 3 is like a smart expert, connecting old-school crafting with the latest technology. It's a fantastic tool that brings together the best of both worlds, making crafting a whole new and exciting experience!
You can read this tutorial in pdf format here.